iTerm2 setup

When it comes to terminals available to use on mac, developers do not have a shortage of options. One thing for sure is that the default terminal available on Mac OS is subpar.
My terminal of choice is iTerm2, an open source popular terminal. Below is a demo of my humble configuration of iTerm2 in action:
0:00
/0:14
Highlights:
- Non-floating, sticky, transparent window.
- Fullscreen window stays within space.
- Ability to navigate & delete words using ⌥ & ⌘.
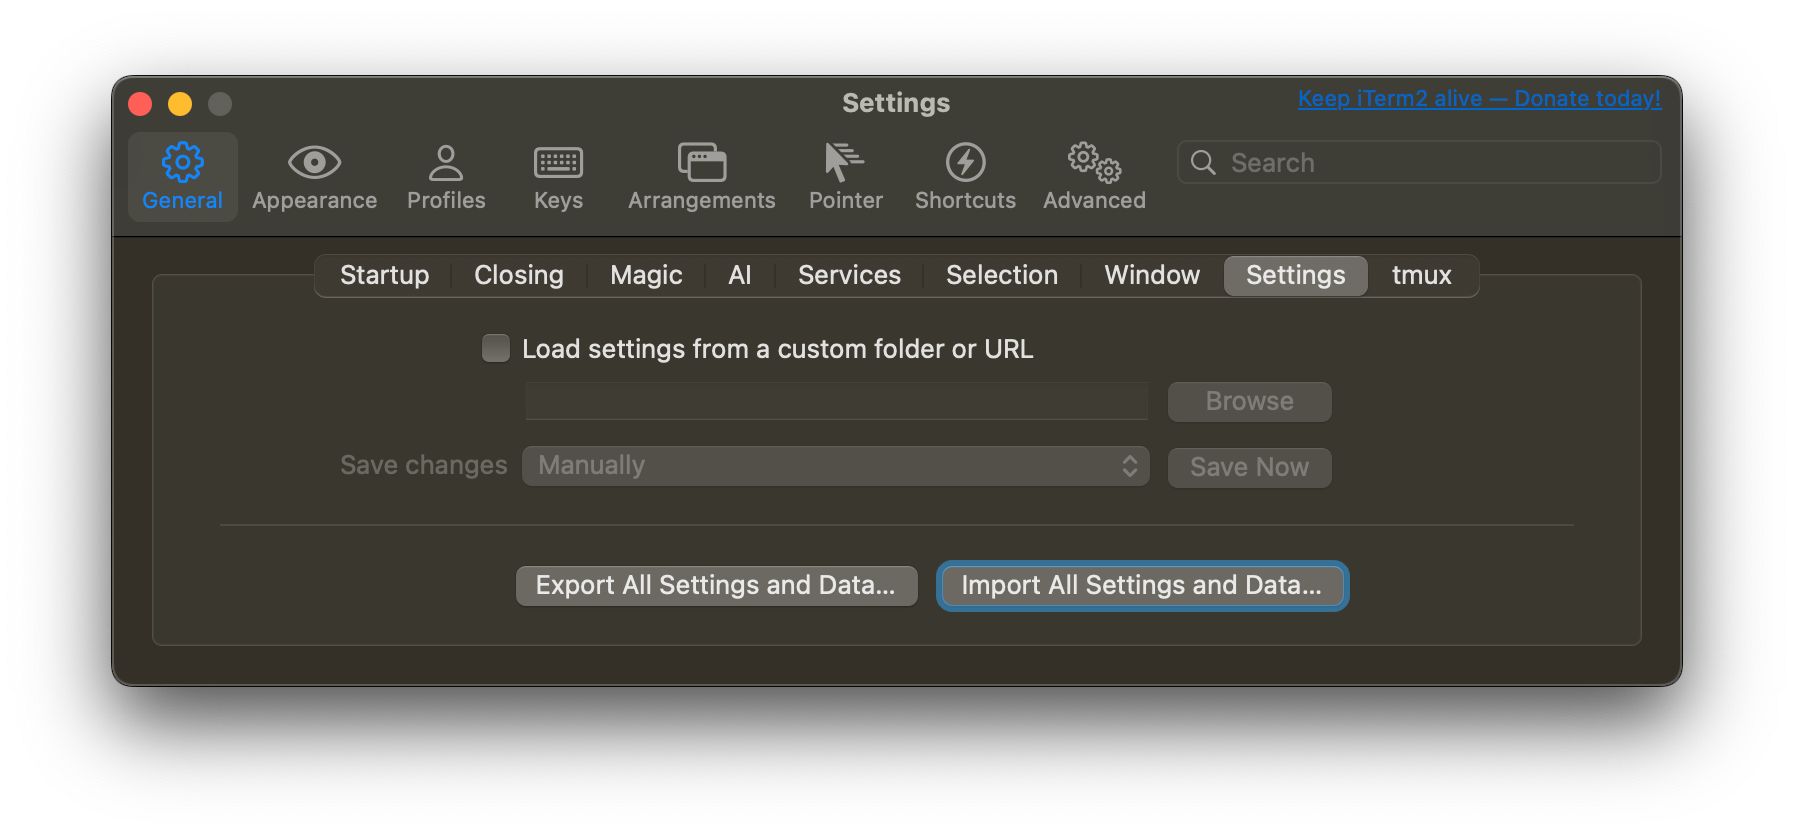
To load all my above settings in one step, import my config file:
General -> Settings -> "Import All Settings and Data..."
Done 🎉
Alternatively, below a step by step process.
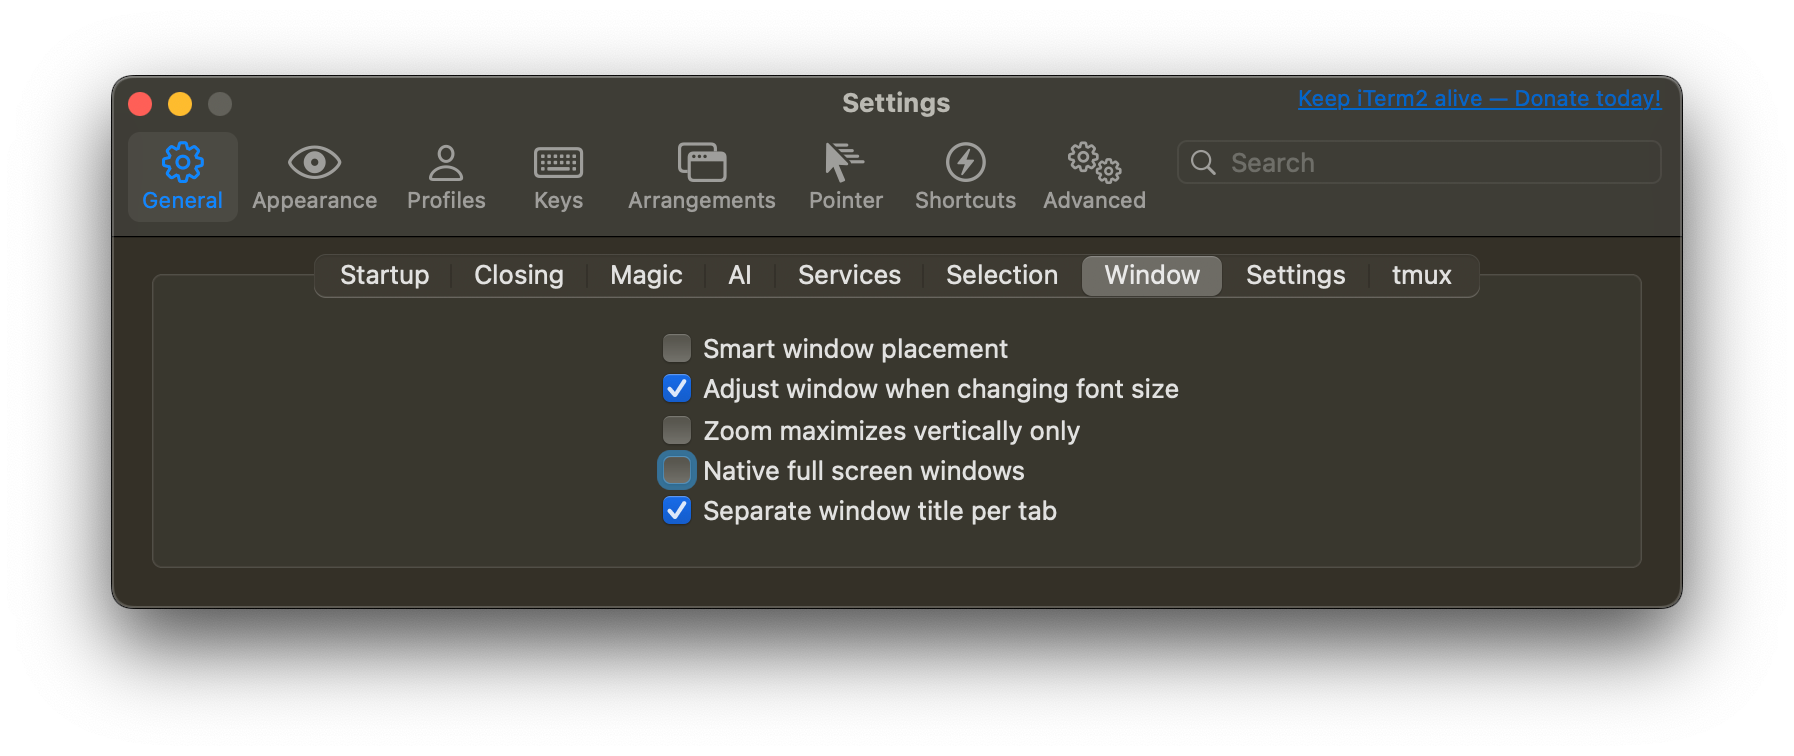
Configure fullscreen:
- General -> Window -> Uncheck "Native fullscreen windows"
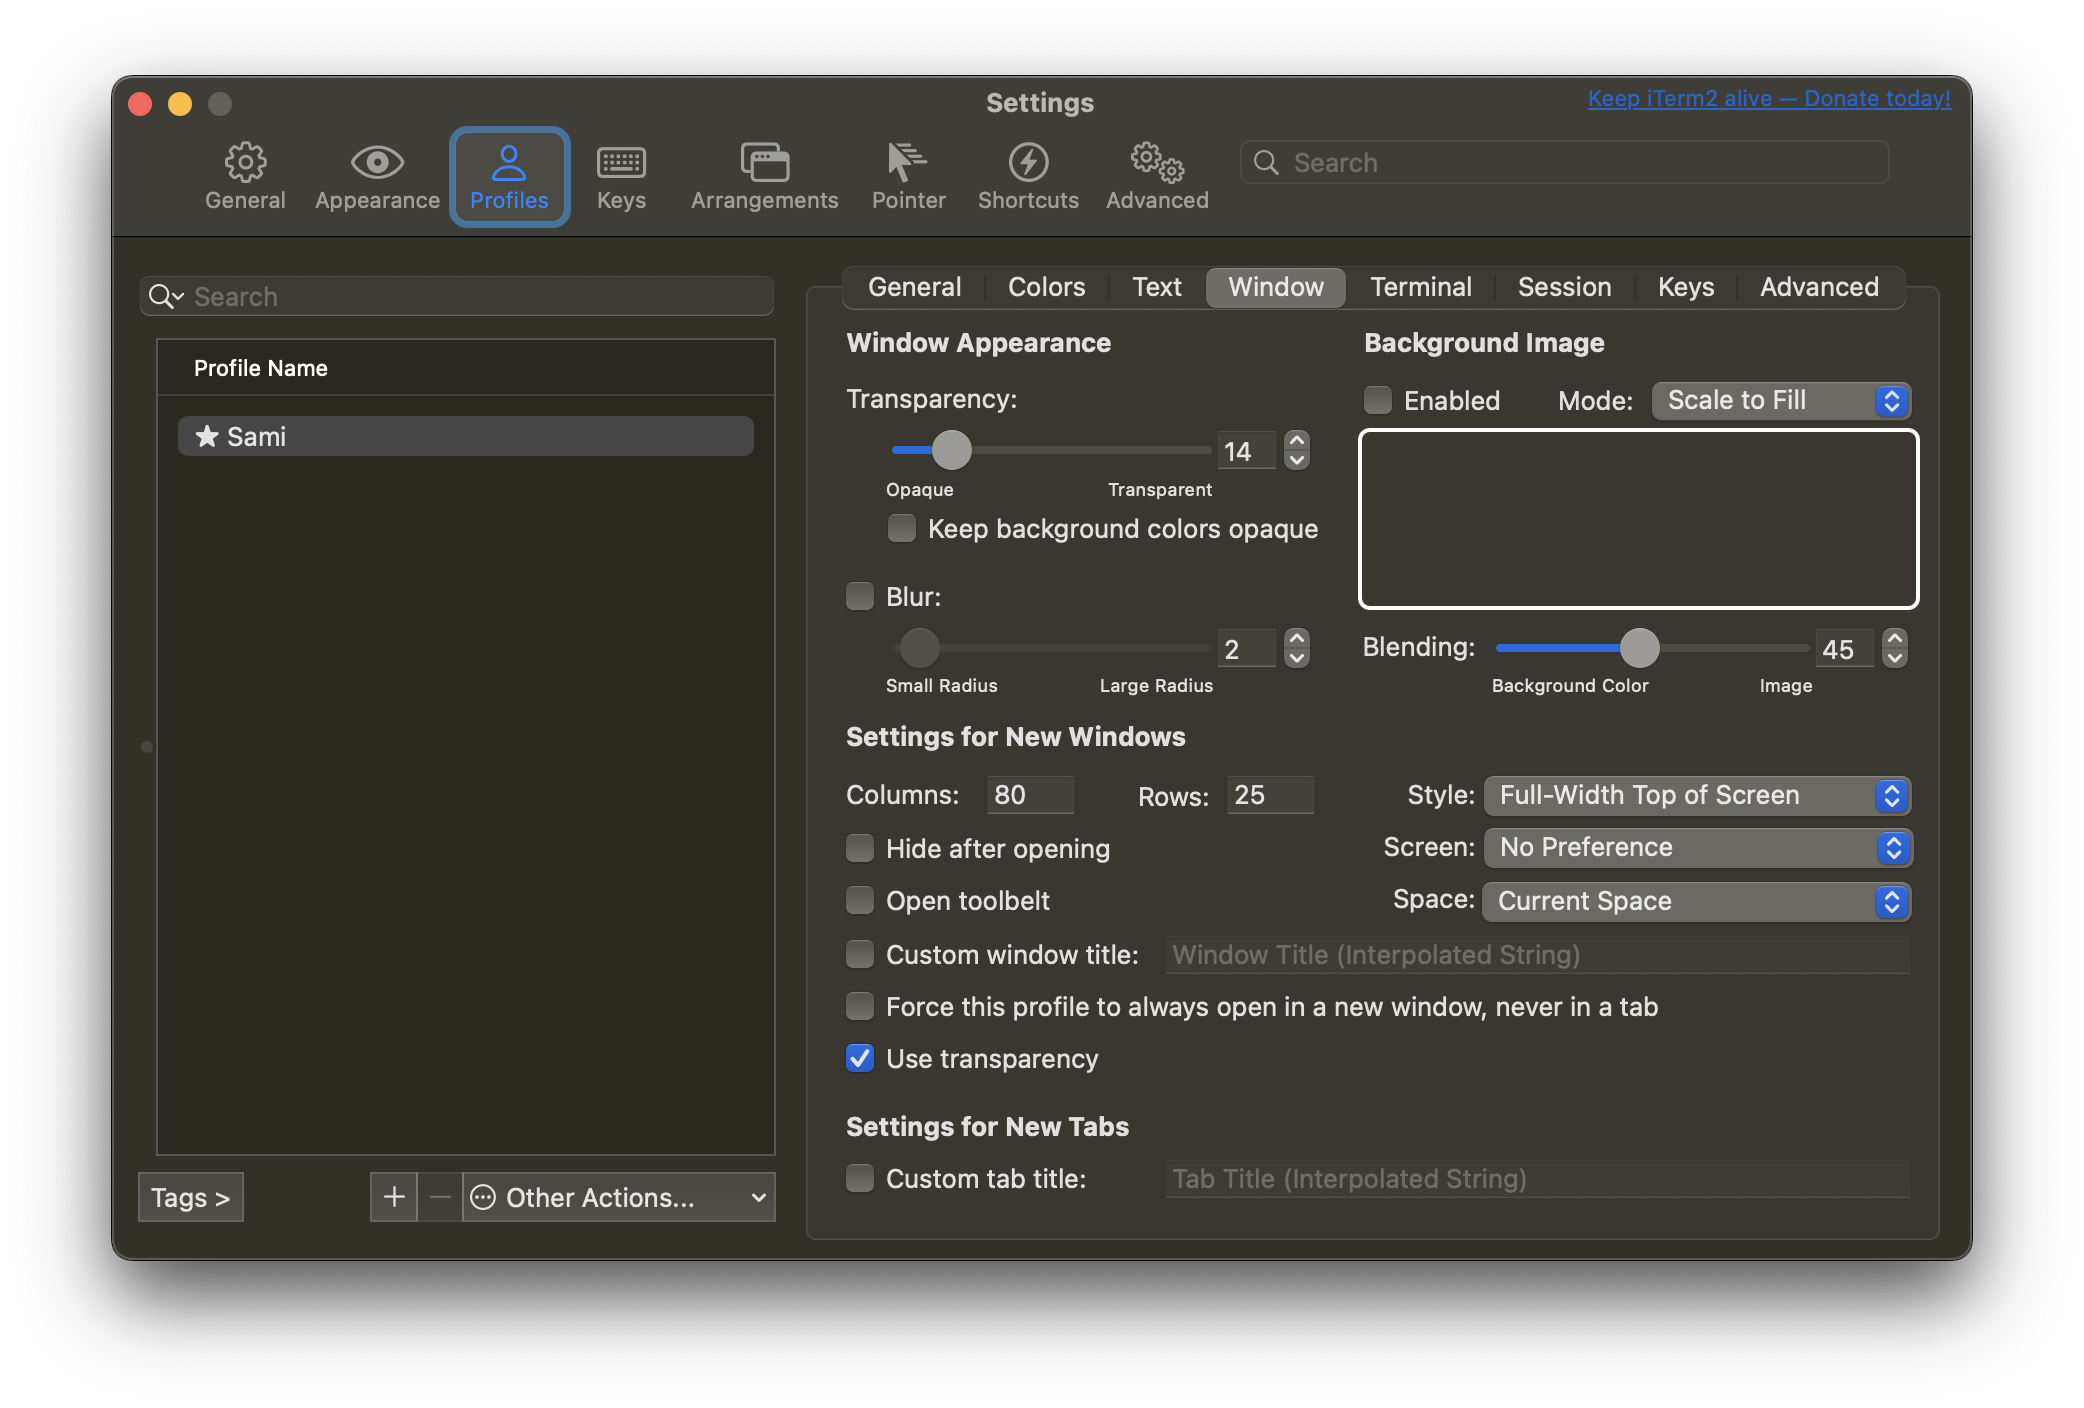
Tabs at the top:
- Profiles -> Window
- Style: "Full-Width Top of Screen"
- Check "Use transparency" while at it
Natural keyboard mappings
- Profiles -> Keys -> Key Mappings
- Select "Natural Text Editing" under Presets
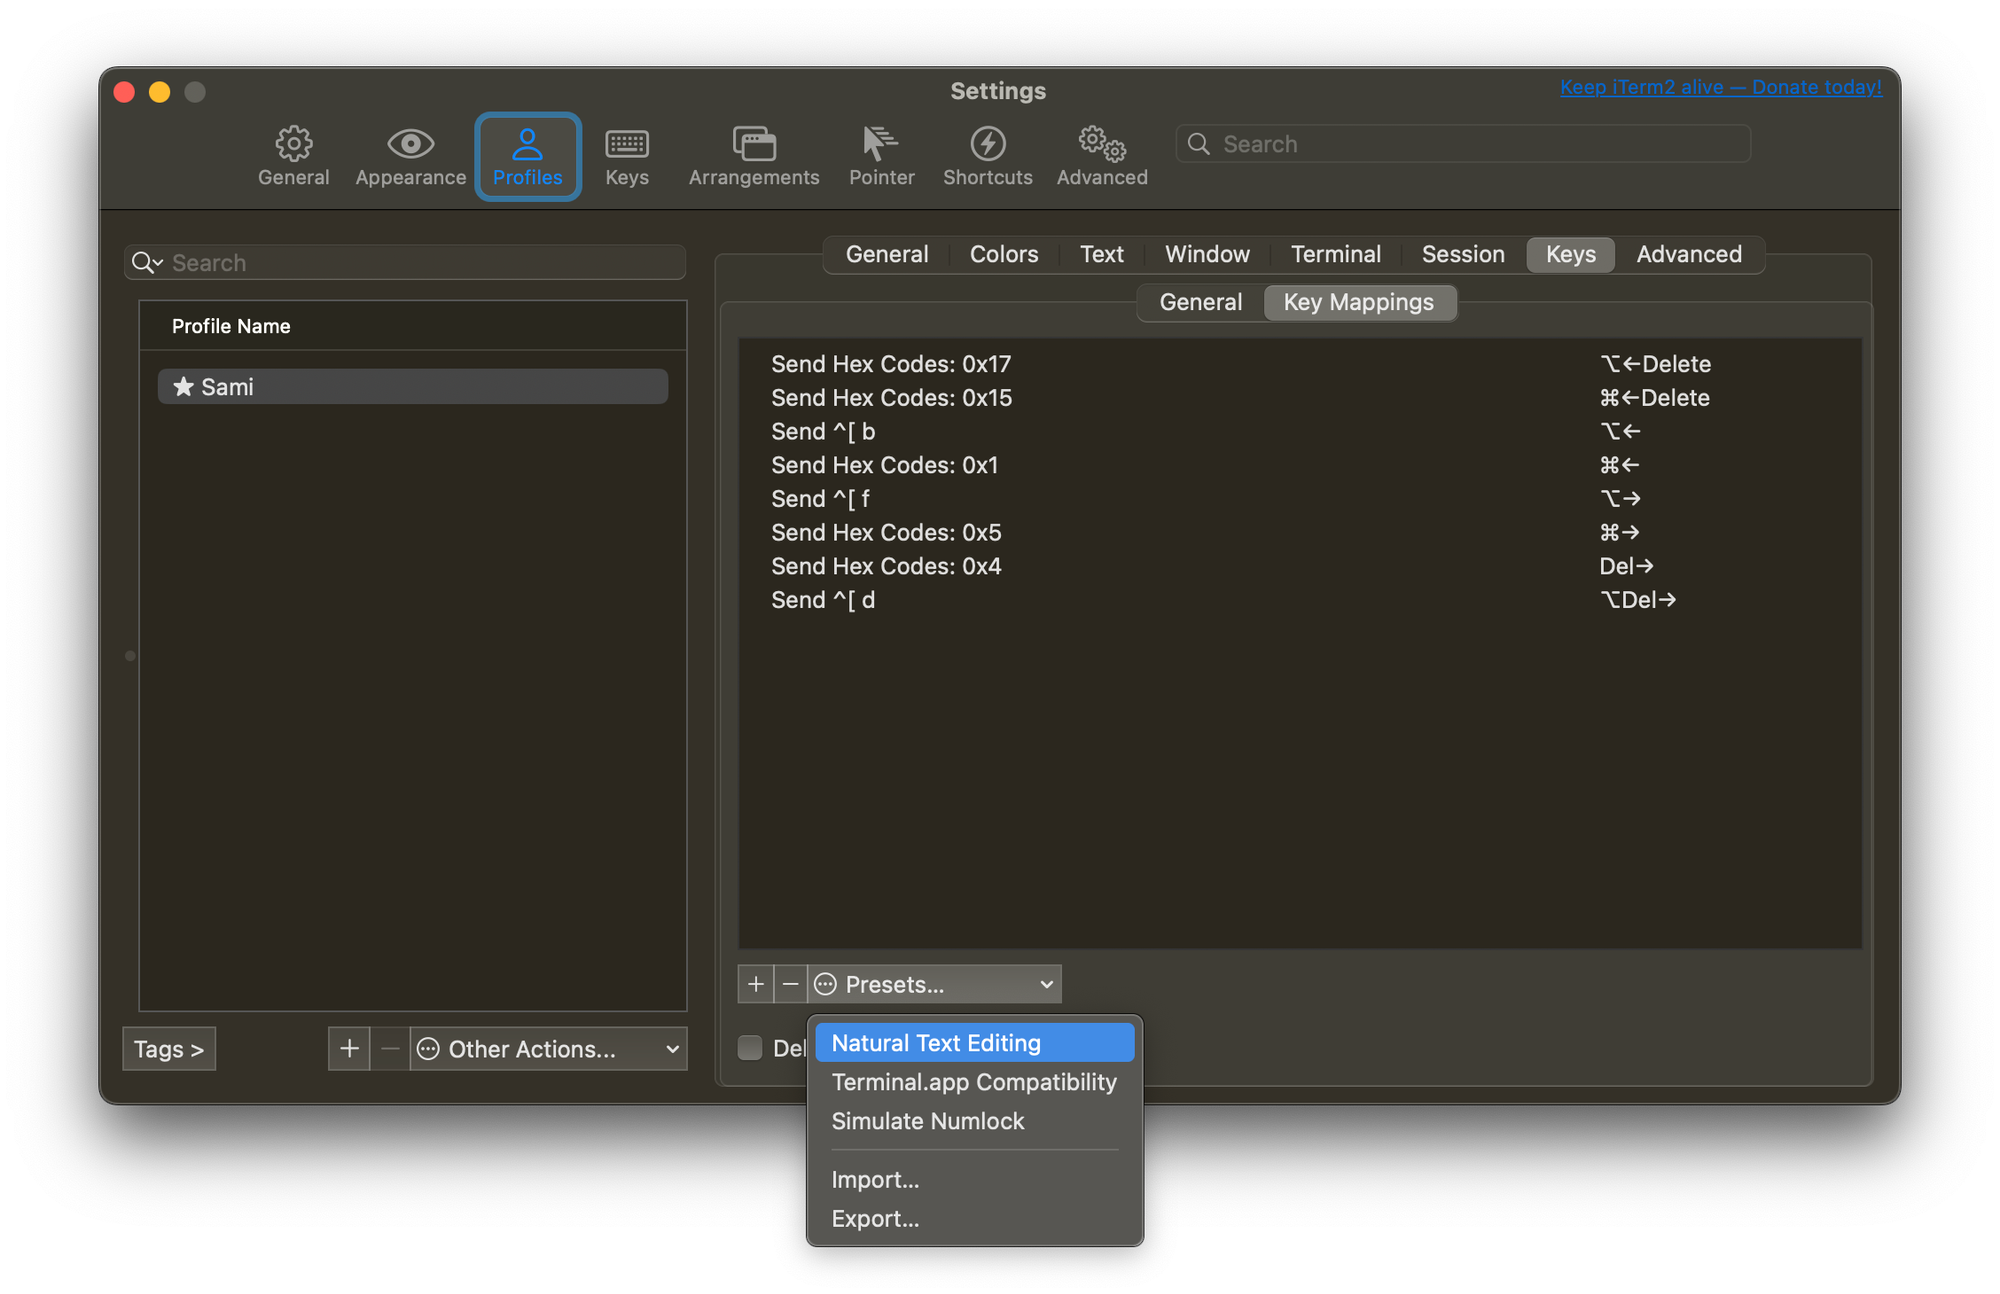
In Sequoia 15.1.1, I had to make a tweak to get word deletion (⌥+delete) working:
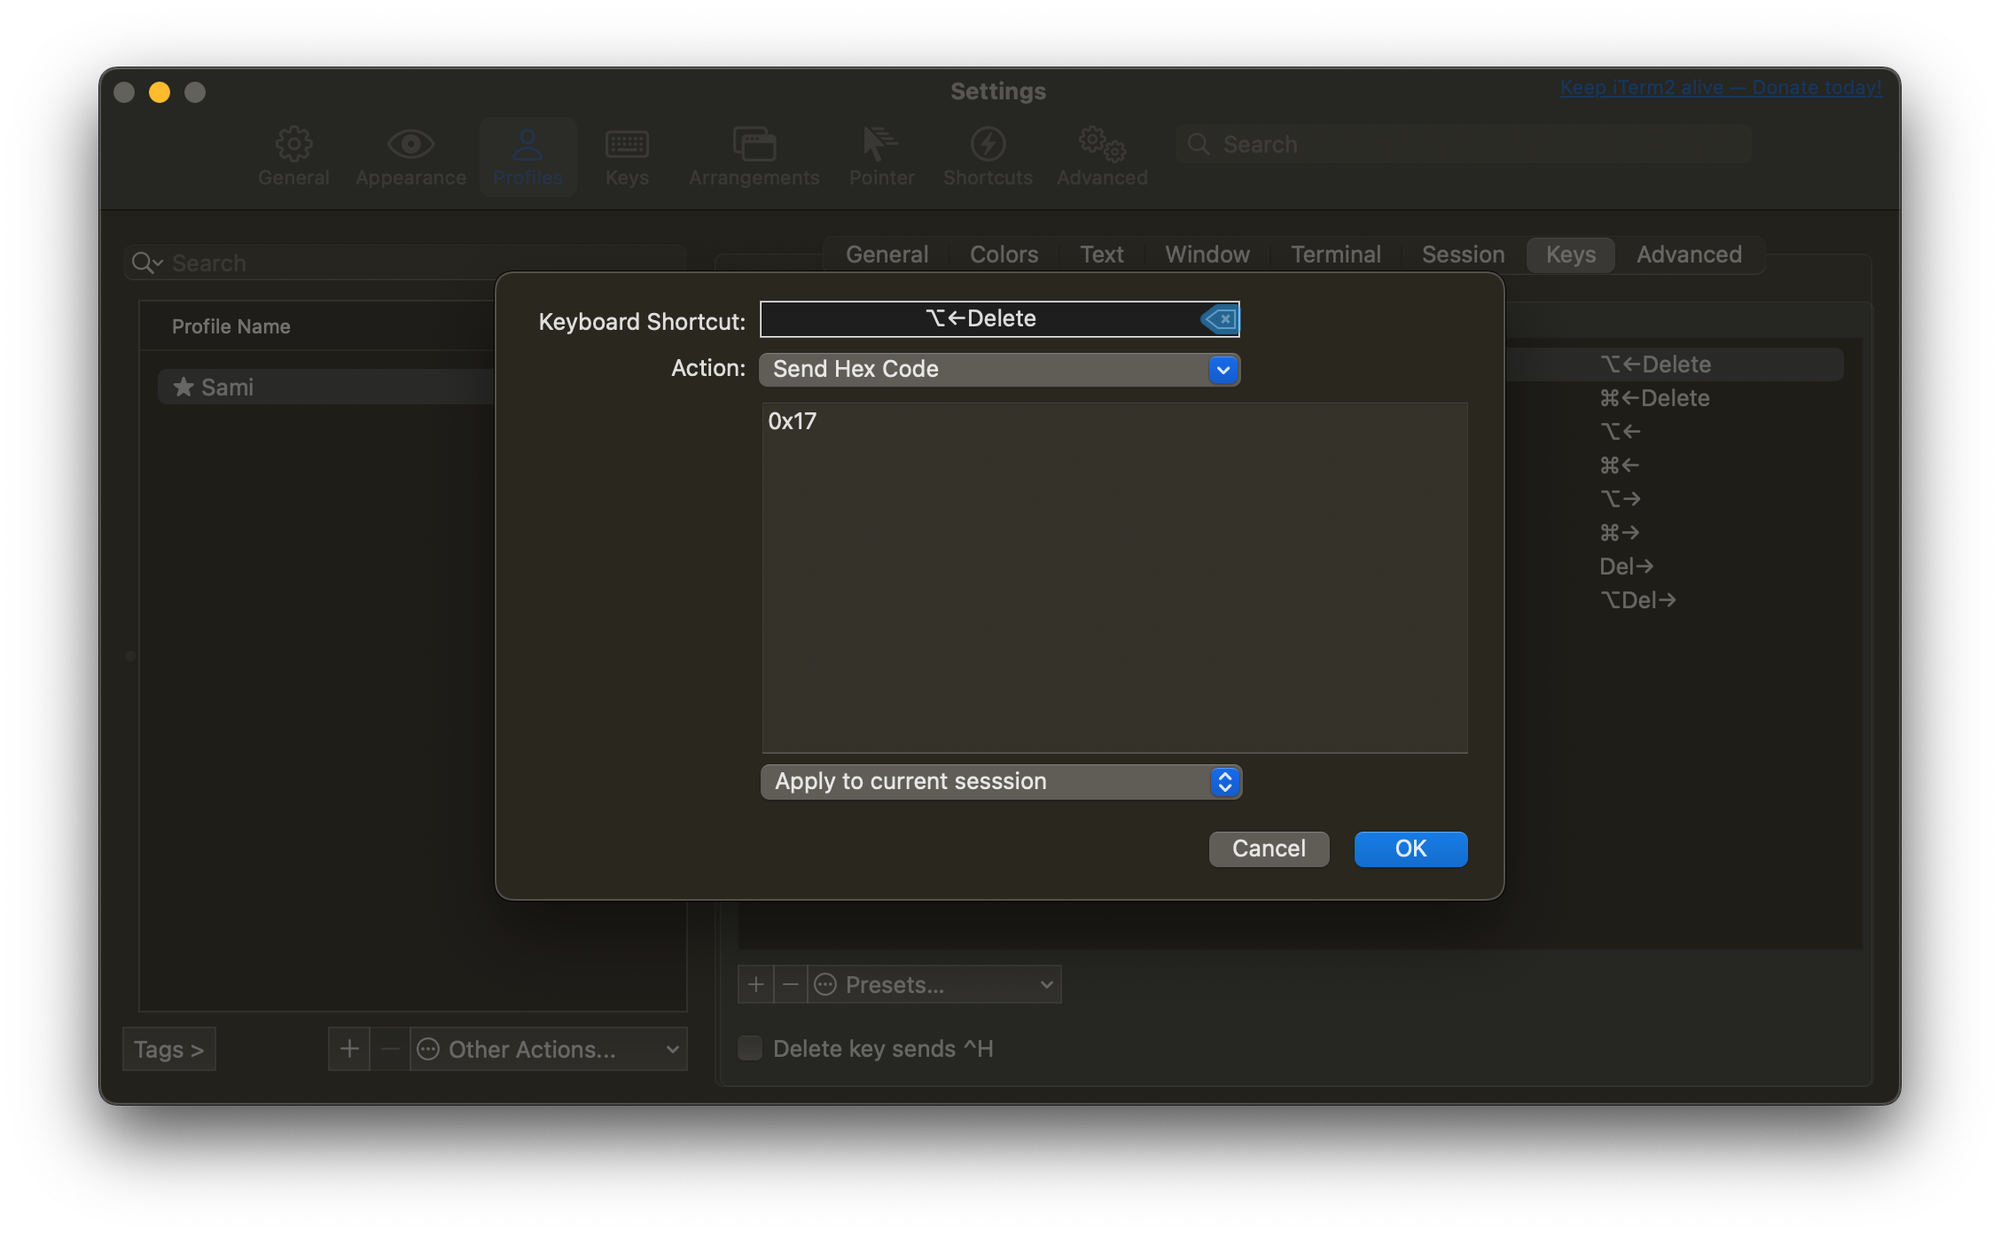
- Double click "⌥<-delete"
- Action "Send Hex Code"
- Place "0x17"
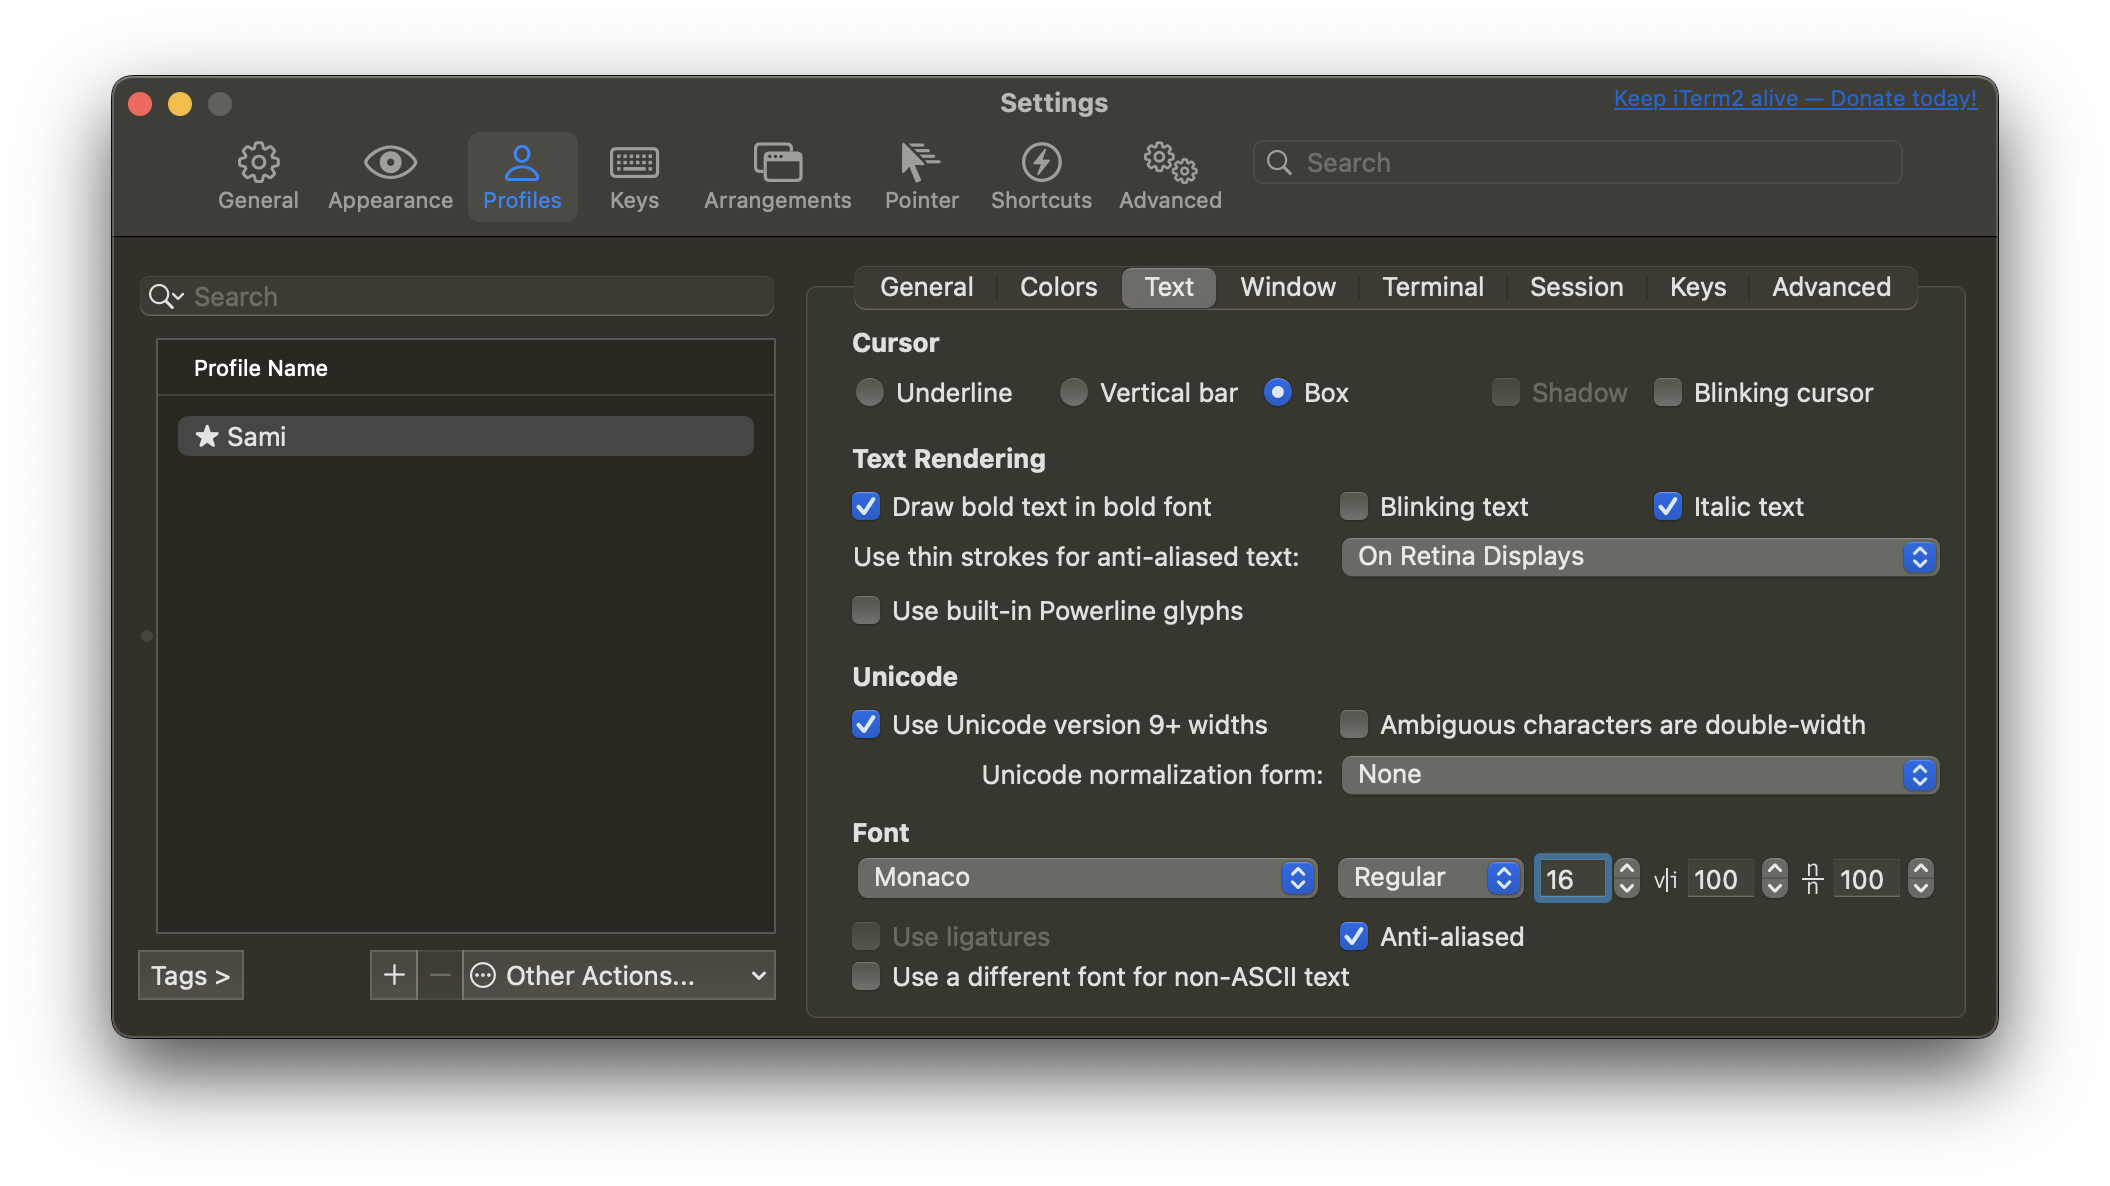
Larger text
- Profile -> Text -> Font "16"
Theme
- Install Oh My Zsh shell.
- Update theme to
ZSH_THEME="jonathan"in~/.zshrc
That concludes my configurations. Thanks for reading!
Discuss on HN.