How to publish a Java / Kotlin library to Jitpack
Publishing a Java / Kotlin library to JitPack was not as easy as I thought, so in finally doing so, put together easy steps for you to follow.

Publishing a Java / Kotlin library to JitPack, while easier than Maven, was not as easy as I thought. A number of annoyances arose with each requiring research & trouble shooting. This article is going to list the steps necessary to you save time where I couldn't.
Create a Java/Kotlin Project
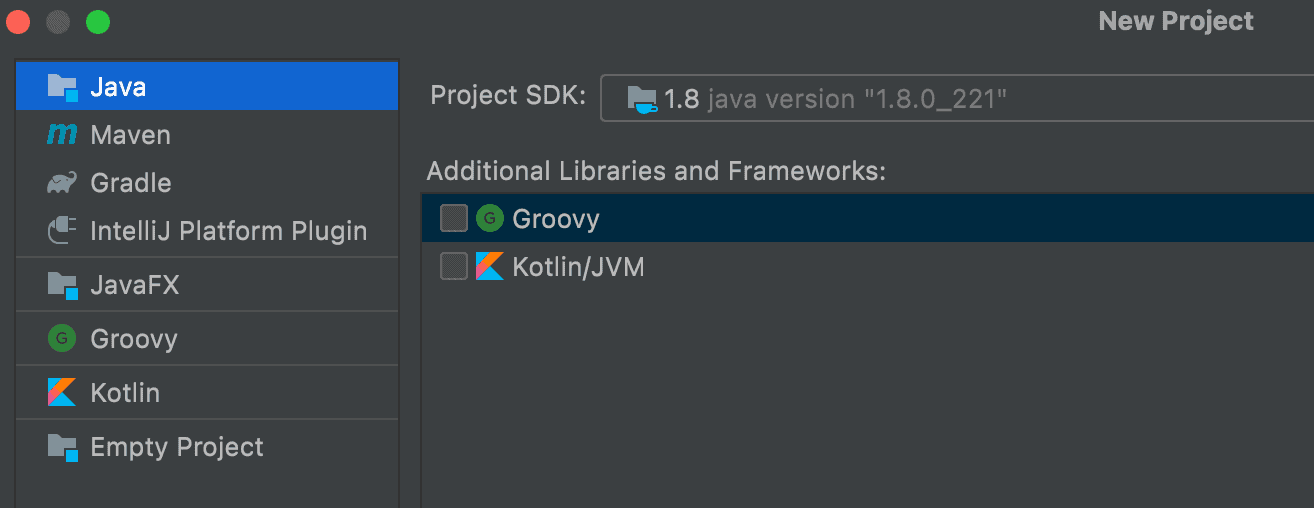
As an Android developer, I mostly use Android Studio and rarely IntelliJ Idea CE. In creating a new Kotlin project using IntelliJ for my library, found myself looking at a few too many good options, instead of 1 obvious one:
- Java: Has sub option of "Kotlin/JVM".
- Maven: Where I'd like my project to get published.
- Gradle: The build system I'm used to using on Android.
- Kotlin: What I'd like to code in.
Choose Gradle
Turns out, the options really meant the following:
- Java: Create a Java project with no dependency supporting build system.
- Maven: Refers to the build system to help compile your project, not the repository.
- Gradle: As above, refers to the build system to help compile your project.
- Kotlin: Same as Java, no complex build system, but for Kotlin.
Given my needs to unit tests it was a toss up: Maven vs Gradle. I initially used Maven and found no hiccups, except for eye strain in looking at XML for dependency declaration. In looking into it more, opted for Gradle given its popularity.
Formulate Artifact Id
- Group Id: Reverse URL identifier that identifies yourself + project name.
- Artifact Id: Project name.
- Version: Numeric value of version.

See this guide by Sonatype for more details.
Add Maven Plugin
Depending on the Gradle version you use, how you incorporate the maven plugin will vary. As of writing this article, Gradle 7.1 is latest, which needs the following added to your build.gradle:
plugins {
    id 'maven-publish'
}

publishing {
    publications {
        mavenJava(MavenPublication) {
            groupId = 'org.eljabali.sami.example'
            artifactId = 'example'
            version = '0.1'

            from components.java
        }
    }
}
Without the above, Jitpack will down the line show in your build log ERROR: No build artifacts found, while building fine.Add JUnit5
Since you're not writing an app, but a library, unit testing allows you to run your code. Furthermore, more test coverage equates to more library credibility.
To add JUnit5 as a dependency, add to your build.gradle:
repositories {
    mavenCentral()
}

dependencies {
    testImplementation "org.junit.jupiter:junit-jupiter-api:5.7.2"
    testRuntimeOnly "org.junit.jupiter:junit-jupiter-engine:5.7.2"
}

test {
    useJUnitPlatform()
}
Last line saves you from a Gradle exception when using Github Actions: org.gradle.api.GradleException: No tests found for given includes: [ ...Enable JUnit Plugin
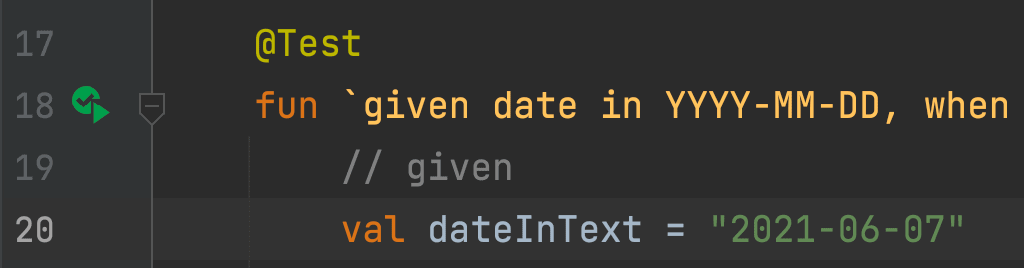
When writing unit tests, I expected the run ▶️ button readily available on the side to run a test easily:
Little did I know, this was plugin functionality for IntelliJ that somehow got disabled. With that said, enable it:

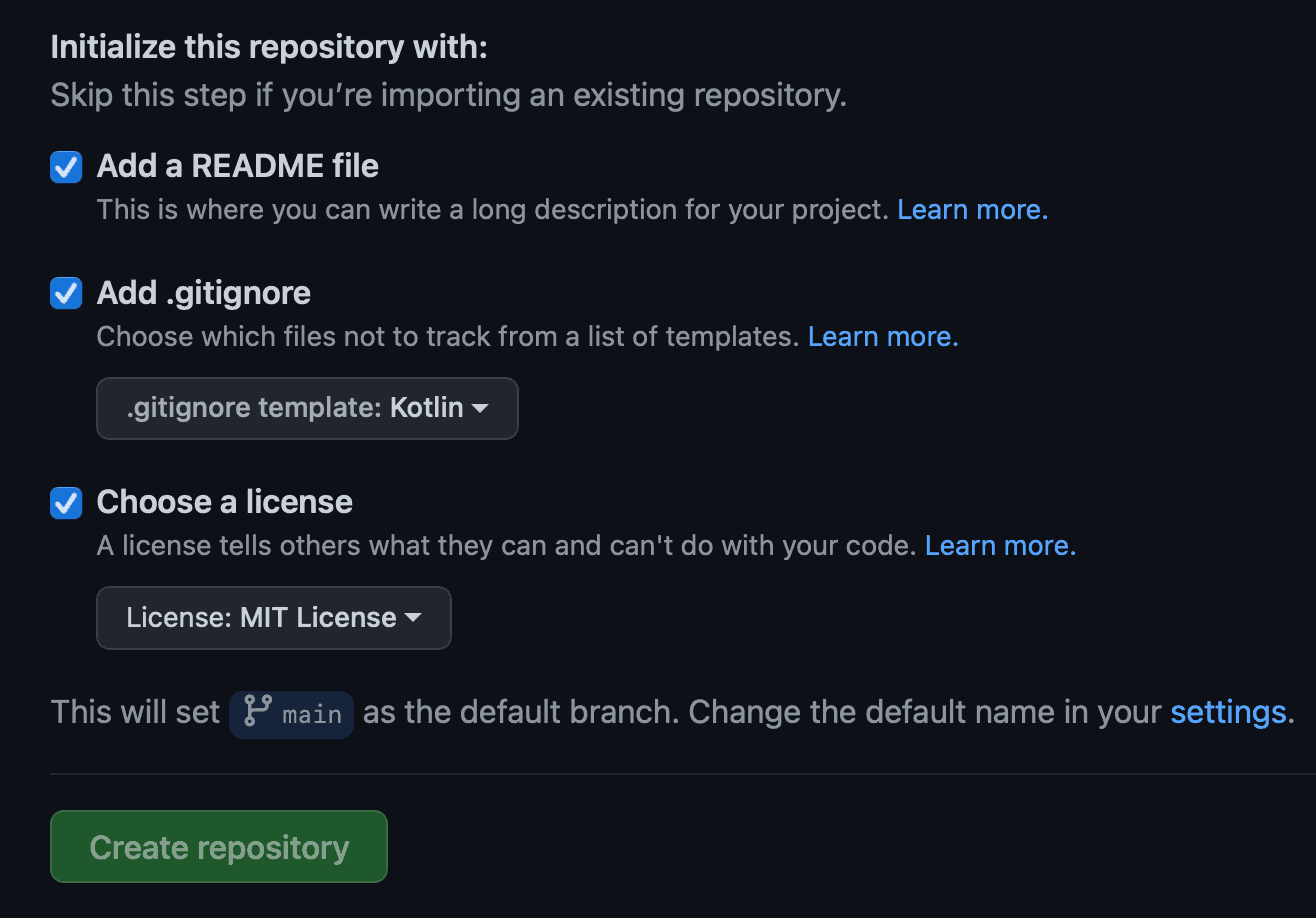
Create Github Repo
When you're creating a repo, you need to choose the project license. I went with MIT after some research, as it's free, with 1 fair usage restriction: for developers to credit you.
Create Github Actions
Go to the "Actions" tab of the project, and hit "set up a workflow yourself"
It'll show an editor with a main.yml file open. Enter the following to run tests against pull requests & commits to main branch:
name: Pull Request & Master CI

# Controls when the workflow will run
on:
  push:
    branches: [ main ]
  pull_request:
    branches: [ main ]

  # Allows you to run this workflow manually from the Actions tab
  workflow_dispatch:

jobs:
  test:
    name: Run Unit Tests
    runs-on: ubuntu-latest

    steps:
      - name: Checkout code
        uses: actions/checkout@v1
      - name: Setup JDK 1.8
        uses: actions/setup-java@v1
        with:
          java-version: 1.8
      - name: Make Gradle executable
        run: chmod +x ./gradlew
      - name: Unit tests
        run: bash ./gradlew test --stacktrace
The last line assumes your project is in the root folder. If it's not, then do bash cd [projectFolder] && ./gradlew test --stacktrace.Push Gradle Wrapper
Be sure to force push your Gradle wrapper files:
git add -f gradle/wrapper/gradle-wrapper.jar
git add -f gradle/wrapper/gradle-wrapper.properties
Github Actions tests otherwise fail with: Error: Could not find or load main class org.gradle.wrapper.GradleWrapperMainCreate a Tag & Release
Tests are running? ✅ Code looks fine? ✅ Ready for first release? ✅ Let's go:
Hit "Create a new release" under Releases in your Github project. There, you first have to create a tag before a release, under "Choose a tag".
Tag name: The library's numeric version number.
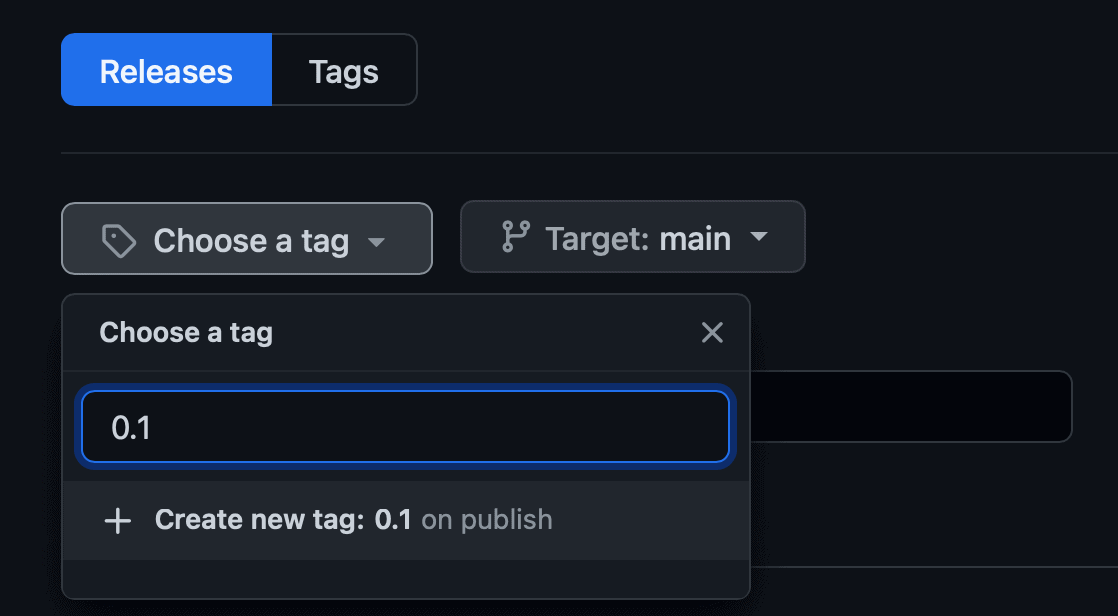
I initially used "v0.1" for a tag, which errored out in adding the library as a dependency.
Jitpack publication check
Go to JitPack and enter your project Github URL. Then you'll see the status of your library and how consumable it is by other projects.
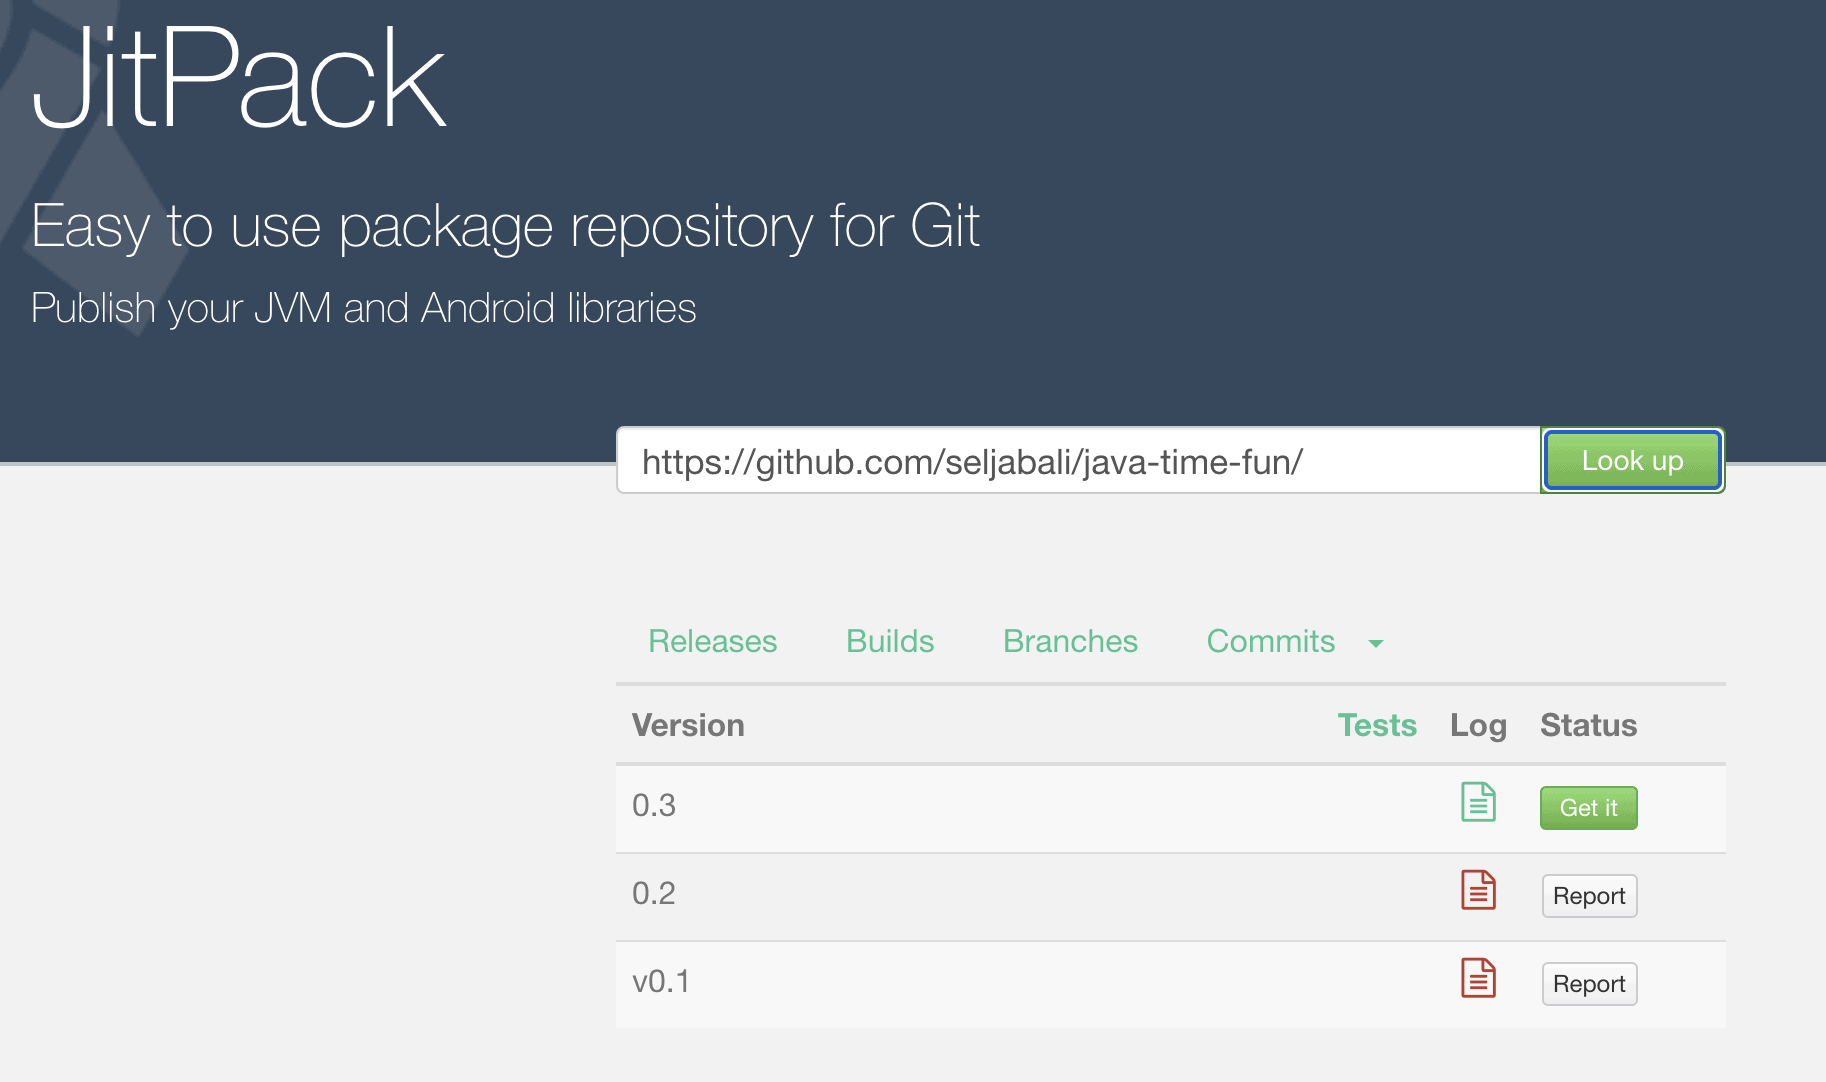
Note the color of Log icons: Green or Red.
Application publication check
Jitpack showing your Log icon as green? ✅ Time to test out the library yourself by adding it as a dependency to a test project. Create a Java or Kotlin project. Add to its root build.gradle:
allprojects {
  repositories {
    maven { url 'https://jitpack.io' } // last one
  }
}
Add to its module build.gradle:
dependencies {
  implementation 'com.github.username:example:0.1'
}
To avoid creating tags every time you want to test your library, place a commit's hash code instead of the tag/version number.
Sync Gradle & you're done!

For reference, check out my Kotlin Date library, which prompted this effort.
That concludes it. We went over the steps needed to publish your own Java/Kotlin library to Jitpack. From adding JUnit testing, releasing it on Github, to publishing it via Jitpack. If found this useful, or came across an issue, shoot me an email.